Using the Bulk File Importer for myData
The Bulk file import tool is an excel add-on for myData to assist users with the bulk upload of Key Photos, Photos, Documents and Links into Assetic's myData.
 Warning: We recommend the Bulk file import to be executed under Assetic consultant supervision at all times, due to the large scale changes it can make. (There is no undo bulk file import)
Import Tools
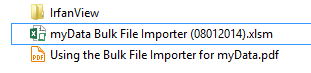
Assetic will supply you with a ZIP file containing the files required to perform a bulk import of documents and/or photos into myData.
Included in the package is a macro-enabled Excel Worksheet, and an image viewer for Windows called IrfanView.
You will need to extract the contents of this ZIP file before proceeding.
Please note that the IrfanView folder included in the ZIP package must reside in the same folder directory as the spreadsheet before running the import tool.
IrfanView is used to resize image files that will be set as key photos in myData.
Setting up the Import Worksheet
Open the myData Bulk File Importer worksheet (you may need to enable content to use the macro functions).
This file contains a set of columns that need to be populated before you can bulk import files into myData:
- The green columns relate to the file that will be imported and the asset it should be attached to.
- The blue columns relate to the document and/or photo options available in myData.
- The pink column will return an error message if there is a problem prior to the file upload.
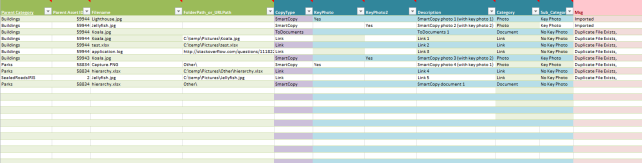
Some rows have been prepopulated with example data to be used as a guide.
A detailed explanation of each column is provided below.
Please note that you can hover your mouse over the column headings in the spreadsheet for a description of the data required:
Parent Category
This column should contain the Asset Category the file will be imported against.
The entered value must correspond to the database table name that holds the assets in the myData database.
E.g. Buildings, Parks, Roads, Pathways.
Parent Asset ID
This column should contain the Asset ID of the asset the file is associated with。
E.g. BR0009, 105648, BLD_002_528.
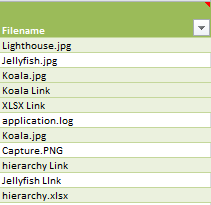
Filename
This column should contain the name of the file you want to import excluding directory (e.g. photo123.jpg, document123.doc).
In the case of Links/URLs, this column may contain the new file names as you want it to appear in myData (e.g. Link 123).
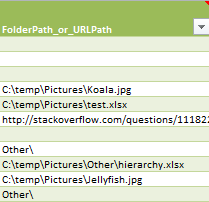
FolderPath_or_URLPath
The value entered into this column will vary depending on the type of file.
For file URLs or web documents:
This column should contain the full folder path to any file(s) you want to link to using a Document URL or a URL path to a web address.
E.g. C:\temp\Pictures\test.xlsx or http://www.google.com
For Key Photos and files to be copied to the myData Shared Directory:
For key photos, documents and photos you wish to copy to the myData Shared Directory, ensure that the source files all reside on the same network drive and/or folder (e.g. P:{color} or C:\temp\pictures).
This parent source file folder will be set in the myData import tool in a later step.
You may leave this column blank as the pictures will then be saved in the shared directory associated with the myData database.
For files that reside in a different location within the parent directory, add the folder details to this column followed by a '\' e.g. (Photos\ or Documents\ or Users\Photos\Other\).
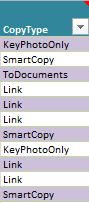
CopyType
Select the type of copy function from this column. The four different options are outlined below:
- SmartCopy: copies image files into the Photos tab in myData, and documents into the Documents tab.
- Link: creates a link to the file in the Documents tab in myData.
This allows you to launch the file from its original location without having to make a copy in myData.
This can also be used to launch to a web address. - ToDocuments: copies the file to the Documents tab in myData, regardless of the file type.
- KeyPhotoOnly: generates a Key Photo or Alternative Key Photo in the Asset Summary tab without making a copy of the file in the myData Shared Directory.
KeyPhoto
A Key Photo can be displayed for each asset in the Summary tab of myData.
Entering ‘Yes’ against an image file in this column will also set the file as the key photo for that asset.
Please note that this function is only valid for image files using the ‘SmartCopy’ or 'KeyPhotoOnly' copy types.
KeyPhoto2
An Alternative Key Photo photo can also be displayed for each asset in the Summary tab of myData.
Entering ‘Yes’ against an image file in this column will set the file as the alternative photo for that asset.
Please note that this function is only valid for image files using the ‘SmartCopy’ or 'KeyPhotoOnly' copy types.
Description
This column may contain a free-text description of the file to be imported, or the link to be displayed.
Use this to assist with identifying the file in myData (this is not required for images files using the 'KeyPhotoOnly' copy type).
Category
This column should contain a category for the file, as you want it to appear in myData.
Adding a category is recommended, as it can assist with organising the files when they are listed in myData.
This is not required for images files using the 'KeyPhotoOnly' copy type.
Subcategory
This column should contain a subcategory for the file, as you want it to appear in myData.
Adding a subcategory is optional, but recommended if you would like to break file grouping further than the category alone.
This is not required for images files using the 'KeyPhotoOnly' copy type.
Msg
Please ignore any values that are initially displayed in this column, this will be overwritten with new messages once the Bulk File Import tool is run.
Configuring the Tool
Once the sheet has been filled out with details of all the files you wish to import, go to Add-Ins > myData > Bulk import file(s) :
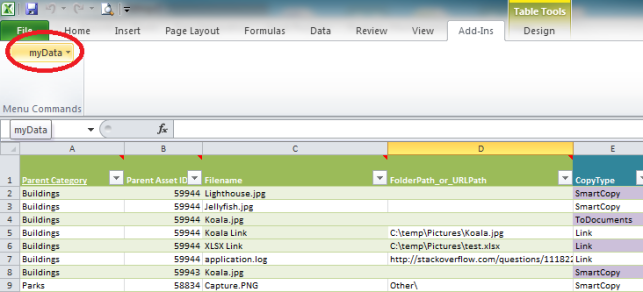
This will open the settings dialogue where you will need to enter information into the following tabs:
Server Settings
In this tab, enter the connection details for your myData database:
Note: You may need to try an alternate driver to successfully connect to a database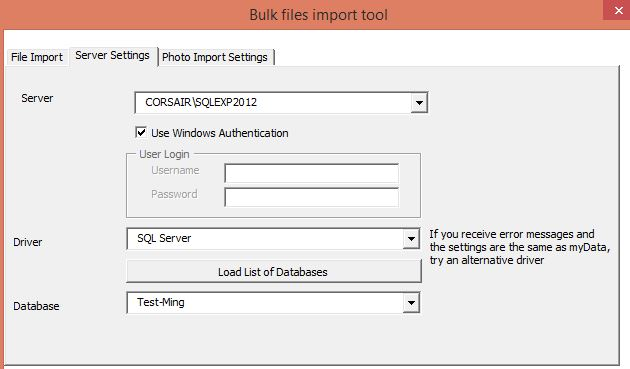
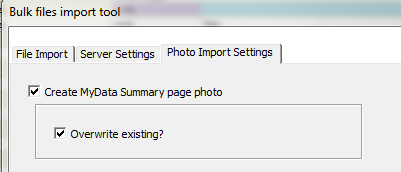
Photo Import Settings
If applicable, check the box to choose whether you want to add a key photo to the myData Summary page.
If so, indicate whether you want to overwrite any existing key photos.
File Import
For Files parent DIR (Source) enter the parent file directory that holds the files you want to copy to the myData Shared Directory.
For MDP Shared Dir (Target) enter the file path to the myData Shared Directory.
You may use the Browse button to navigate to these locations.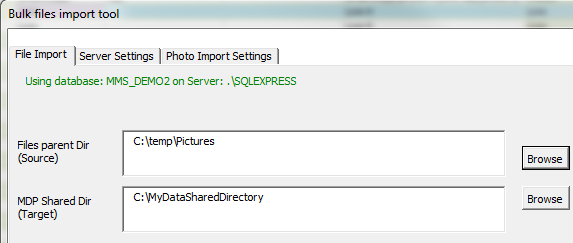
Running the Tool
Once the variables above have been entered, hit the Check Files button under the File Import tab:
Once complete, please review any messages that may now appear in the Msg column in the spreadsheet.
If errors do appear, adjust the data in the spreadsheet and re-run the file check until there are no more errors before proceeding.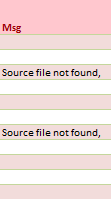
Once all errors have been rectified, hit the Import Files button to carry out the import: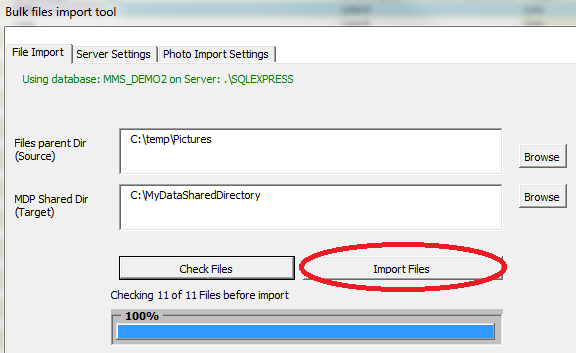
Results
Following a successful import, the Msg column of the spreadsheet will be updated with a value of 'Imported' or 'Key Photo Imported' for each file successfully added to myData.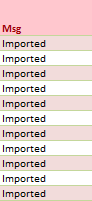
To verify results, open myData and select an asset that has newly imported files against it.
Check the key photos, Documents tab and Photos tab to ensure that the imported files appear as desired.
